
All content - Martyn Johnston
The Process:


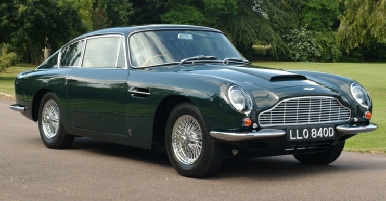
1: Initial Image:
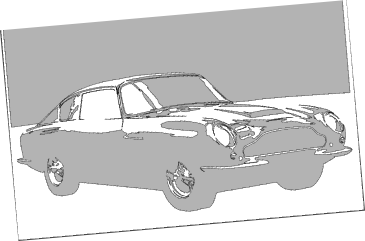
2: Monochrome Image:

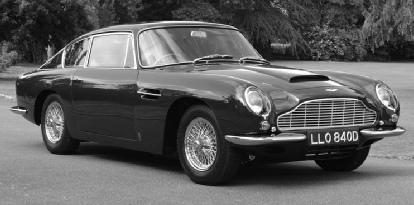
3: Black & White image:
First step is to find a suitable image; not as easy as it sounds. It has to end up black & white, with strong light & shadow contrast.
Many photos or images end up being too grey-scale; ie they merge from black to white gradually. This is especially difficult for faces; it makes it hard to move on to the next stage.
This is the most important preparation stage to get just right. This takes hours to get the grey-scale to look right in stark black & white. Many images fail at this point; they just don’t work. This one was difficult, but ended up looking pretty good I thought. I struggled with what to do about the radiator grill; far, far too detailed to cut out in wood, but iconic to the image I wanted. I did make the mistake of attempting to do too much detail in the spokes of the wheels, and had to simplify those later.

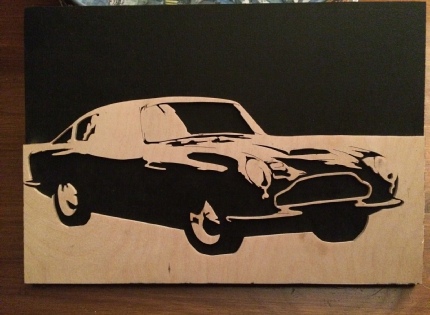

5: Final Wood-cut:
In most cases the black & white image will be very ‘dotty’ (raster) so I convert it to a line drawing (vector) image below-left (using the excellent (and free) ‘InkScape’ software). This lets you create an outline, and also to shade it nicely; helps enormously when cutting out detailed parts.
Then save it as a PDF file. I can then print this out at any size I want.
4: Vectorising:
I print out the final image to the size I want.
On the first one I ever did I glued the printed paper sheet to the face of the wood, but this is almost impossible to get off later; so I learned (from somewhere on the Internet) to put masking-tape over the face of the wood, then glue the image to that; comes off much easier :-)
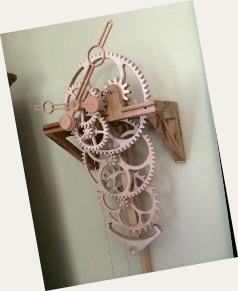
I like to use a fine-grained, Baltic-birch plywood; it’s very pale and shows the contrast well. I did this Aston Martin in 3 mm ply, but have done subsequent ones in 6 mm or even thicker, because it’s just that bit more robust and looks more substantial at the end. Cut all the black bits out with a very fine-toothed electric scroll-saw. The slower and more careful you do this bit the better; - DON’T rush.
Any white ‘islands’ need cutting out and will need careful positioning later. This included both wheel hubs and the radiator grill on the Aston Martin above.
You need to drill starter-holes through any black ‘holes’ to get the scroll-saw blade through.
I try to design the image with as few of these ‘islands’ and ‘holes’ as I can (none if possible). All part of the challenge. (The ‘Bob Dylan’ and the ‘John Martyn’ ones are all one piece of wood; one with only one ‘hole’ and the other with only one ‘island’ ).
Then you have to sand it; - a lot. Start with about 180 grit, move up to 300+ to make it as smooth as possible. You might need a very fine needle-file to clean up some of the inside radii. This bit’s a bit boring but it truly is worth taking as much time as you can here to get a good quality finish. This is the bit you’ll notice afterwards if you don’t do it well enough !
When I’m finished sanding I always leave it a couple of days then go back and sand it all again. You’d be surprised how many little bits need cleaning up even after you think you’ve finished.
Some of the pictures I’ve sprayed at this point with a satin-finish polyurethane varnish. I think I prefer the natural wood finish but the varnish helps stop it getting so dusty on the wall.
Glue it onto a black backboard, again I use birch ply, usually 1/2” (12mm).
Easy peasy.
| Portraits: |
| Animals: |
| Vehicles: |
| Other: |
| Badger 1: |
| Eagle: |
| Badger 2: |
| Stag1: |
| Stag2: |
| Cranes Over Water: |
| Wading Stork 1: |
| Wading Stork 2: |
| Three Hares Leaping: |
| Friends (Cat and Dog): |
| Gull - Taking Off: |
| Foxes Playing: |
| Two Foxes: |
| Horse: |
| Aston Martin DB6: |
| Sea King Rescue: |
| Harrier: |
| Rose: |
| The Fish House: |